
Please ensure Javascript is enabled for purposes of website accessibility

7 Best DIY Acoustic Panels for Home Studios?

Creating a better-sounding home studio does not require an expensive commercial treatment package. With careful planning, diy acoustic panels can reduce flutter echo, soften harsh reflections, and make recordings easier to judge. However, panels treat sound inside a room. They do not fully block traffic, neighbors, or computer noise.

This guide explores seven practical panel designs for bedrooms, offices, and compact production spaces. Each option considers material cost, construction difficulty, visual appeal, and acoustic purpose. Common materials include rigid mineral wool, fiberglass boards, timber frames, breathable fabric, and simple mounting hardware. A small air gap behind each panel can improve low-frequency absorption. Corner placement can also help manage bass, although thin panels rarely solve serious bass problems.

Measure before cutting.

A reliable build starts with identifying the first-reflection points beside the monitors and above the listening position. Use a mirror, a tape measure, and careful listening. Real-world projects often reveal uneven walls, limited space, or fabric that stretches badly. Those details matter. I would not treat every design as equally effective, because room dimensions and panel thickness change the result. Safety matters, too. Wear suitable protective equipment, contain loose fibers, and choose materials that meet local fire-safety guidance. This comparison aims to balance accessible DIY methods with honest limitations, so you can build treatment that supports clearer monitoring without expecting miracles.
7 Best DIY Acoustic Panels for Home Studios?

What DIY Acoustic Panels Are and How They Improve Home Studio Sound

DIY acoustic panels are framed absorbers that reduce unwanted reflections inside a room. They do not block outside noise or make walls soundproof. Instead, they soften claps, vocals, guitars, and monitor playback. This creates a clearer space for recording and mixing.

A useful panel usually contains porous insulation inside a wooden frame. Cover it with breathable fabric, leaving the material safely enclosed. Hang panels at ear height beside the listening position. Add another panel behind the speakers or above the desk. A small air gap behind each panel can improve low-mid absorption.

Wear eye protection, gloves, and a suitable mask while cutting insulation. Safety matters more than saving a few minutes.

My first layout was too symmetrical. The room looked tidy, but certain bass notes still sounded uneven. I moved one panel and checked familiar recordings again. Better, but not perfect. Clap tests help locate sharp echoes, yet they cannot replace careful listening. Use short recordings, take notes, and change one panel at a time. Thick panels generally absorb more lower frequencies than thin ones. Corners may need thicker treatment, especially in small rooms. Do not cover every surface with absorption. A completely dead room can feel unnatural and hide useful musical detail. DIY panels work best when placement follows the room, not just appearance.

How to Choose Materials for Effective DIY Acoustic Panels

7 Best DIY Acoustic Panels for Home Studios?

Material choice matters more than decoration. My first DIY panels looked neat, but they were too thin to control low-mid buildup. For most home studios, porous materials work better than hard foam. Mineral wool, fiberglass, or recycled cotton can absorb mid and high frequencies when air can pass through them. ASTM C423 calculates the Noise Reduction Coefficient from absorption at 250, 500, 1,000, and 2,000 Hz. That range matches many vocal, guitar, and monitoring problems, but it does not fully represent bass performance. A panel’s thickness and air gap remain critical.

A 100-millimeter absorber usually performs more consistently than a 50-millimeter panel. Adding a 50-millimeter air space can improve lower-frequency absorption without adding more material. ISO 354 laboratory testing also shows why installation matters: absorption values depend on mounting conditions, room surfaces, and test methods. Use a rigid wooden frame, dense porous filling, and breathable fabric. Avoid plastic-backed cloth. It can reflect sound instead of letting it reach the absorber. I still question whether my own panels are too dense; excessive compression may reduce airflow and absorption.

Tips: Build two thick corner panels first. Place them at early-reflection points, roughly beside the speakers and listening position. Clap tests can reveal flutter echo, but measurements are more reliable. Use a calibrated microphone and compare decay times before and after installation. Wear gloves and eye protection when handling fibrous materials, then seal every exposed edge.

Seven DIY Acoustic Panel Designs for Different Studio Needs

Seven DIY Acoustic Panel Designs for Different Studio Needs

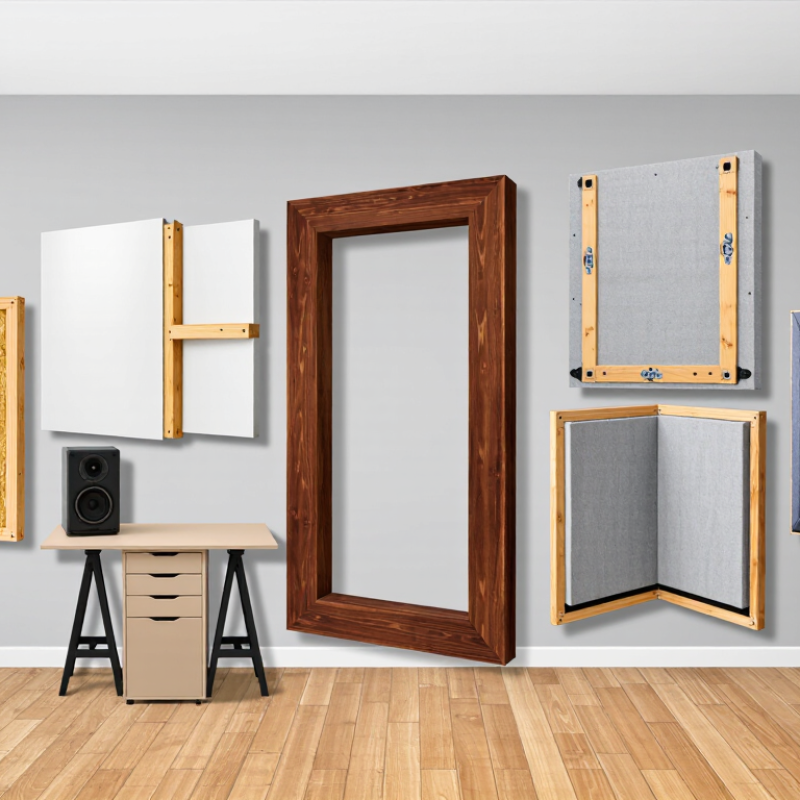
A home studio rarely needs identical treatment everywhere. Start with broadband panels made from dense mineral wool, wrapped in breathable fabric. They control reflections around speakers and the listening position. Build panels 10 to 15 centimeters thick for stronger low-mid absorption. My first panels were too thin, and the room still sounded boxy.

For bass control, create triangular corner traps with deep insulation. They need more space but reduce the heavy buildup near 80 to 150 hertz.

A ceiling cloud helps tame reflections above a desk or vocal area. Mount it with a small air gap.

For a livelier room, try a wooden slat diffuser over an absorbent core. It scatters sound without making the space completely dead.

Portable gobos suit renters and small rooms. Place them beside a singer, guitar, or microphone to reduce unwanted reflections.

A hinged panel can also create a temporary recording booth.

For mixed needs, use hybrid panels with absorption on one side and diffusion on the other.

Tips:

Keep fabric acoustically transparent, not tightly woven plastic. Test one panel at a time with hand claps and familiar recordings. Leave some reflective surfaces uncovered. Too much absorption can make vocals feel unnaturally dry. Measure speaker placement before drilling. DIY work is rarely perfect, and uneven spacing may reveal problems later. Recheck the room after furniture changes, because a single bookcase can alter the balance.

Step-by-Step Methods for Building and Mounting Acoustic Panels

Cut two 600-by-1200-millimeter frames from straight, dry timber, then check each corner for squareness. Fit 50-millimeter-thick mineral-fiber or fiberglass insulation snugly inside; avoid compressing it, because gaps and compression can change absorption.

Wrap the frame in breathable fabric, and staple the back tightly. Wear gloves and a suitable dust mask while cutting insulation. A loose fiber or two is easy to miss.

Mount panels at the side-wall reflection points, using a mirror to locate where each speaker appears from your listening seat. Leave a small air gap behind them when possible; this can improve low-frequency absorption compared with mounting panels flush. Secure each frame to a stud or a properly rated anchor, and keep panels clear of outlets and heat sources.

For a home-studio reference, ANSI/ASA S12.60 specifies a 0.6-second reverberation-time limit for certain small classrooms. That is not a studio rule, but it shows why measured decay matters. ASTM C423 reports sound absorption by frequency, so look for test data rather than trusting a panel’s thickness alone. DIY results vary. Record a listening test before and after installation, then adjust panel positions; I’ve found that one placement can sound oddly dull.

How to Arrange DIY Panels for Balanced Room Acoustics

How to Arrange DIY Panels for Balanced Room Acoustics

Good panel placement matters more than covering every wall. In a small home studio, start with the first reflection points beside your listening position. Ask someone to slide a mirror along each side wall; when you can see a speaker from your chair, mark that spot. Place a panel there, and repeat on the opposite wall. A panel on the ceiling reflection point can also help. Keep speakers and your chair roughly symmetrical, even if the room is not.

Tips: Begin with a few panels. Listen to familiar vocals and handclaps before adding more. Keep panels clear of vents, and mount them securely. Use suitable protective gear when handling insulation, and fully enclose the material behind breathable fabric.

For a more even sound, treat the wall behind the speakers and consider thicker absorption in corners, where low-frequency buildup can linger. Don’t cover every surface; too much absorption can make a room feel unnaturally dull. Make one change at a time, then listen from your usual seat and check recordings on headphones or another playback system. Room response varies, and my first layout would not be everyone’s best one. A phone recording can offer clues, but it is not a precise measurement.

7 Best DIY Acoustic Panels for Home Studios — How to Arrange DIY Panels for Balanced Room Acoustics

DIY Panel Type Typical Core Best Use Suggested Placement Key Considerations
Mineral Wool Fabric Panel Acoustic-grade mineral wool, commonly 50–100 mm thick Broadband absorption for reflections and room decay Side-wall reflection points, front wall, and rear wall Use breathable fabric and a rigid frame; wear suitable protection when cutting and handling the core.
Glass Wool Fabric Panel Rigid or semi-rigid glass wool, commonly 50–100 mm thick Broadband treatment in recording and mixing spaces First-reflection areas and selected ceiling positions Choose a stable, safely enclosed core; a small air gap behind the panel can improve low-frequency absorption.
Deep Corner Bass Trap Thick porous insulation, typically 150 mm or deeper Reducing low-frequency buildup and uneven bass decay Vertical room corners; prioritize corners behind speakers Greater depth and an air space generally help porous absorbers work lower in frequency.
Air-Gap Wall Panel 50–100 mm porous absorber mounted away from the wall More efficient broadband absorption than a panel mounted flush Side walls and rear wall at reflection or problem areas Keep the gap consistent and secure the panel with hardware rated for its weight.
Ceiling Cloud 50–100 mm framed porous absorber Reducing ceiling reflections between speakers and listening position Horizontally above the listening and recording area Leave an air gap where practical and use reliable anchors attached to suitable structural support.
Slatted Absorber Porous absorber behind spaced wood slats Combining absorption with a more reflective, less uniform surface Rear wall or selected side-wall sections Slat width, spacing, and backing affect performance; avoid treating every wall with the same design.
Portable Gobos Freestanding framed porous absorber Flexible vocal, instrument, or temporary recording setups Between a sound source and reflective surfaces, without fully enclosing the performer Use a stable base and leave some open space to reduce an overly dry or boxy recording sound.
Arrangement tip: Treat early-reflection points on the side walls and ceiling first, then address bass buildup in corners. Use a mirror from the listening position to locate side-wall reflection points, and add panels gradually while checking recordings or measurements. Acoustic panels reduce reflections and decay; they do not provide sound isolation.