
Please ensure Javascript is enabled for purposes of website accessibility

7 Soundproof Foam Tips for Better Soundproofing?

A room can look professionally treated and still leak conversation, traffic noise, or bass through its walls. Soundproof Foam helps control reflections inside the room, but it cannot replace mass, sealing, or structural isolation. That distinction matters when planning better soundproofing.

Rod Gervais, an experienced recording-studio designer and author, captures the limitation clearly: “Foam absorbs sound; it does not soundproof a room.” His point is practical. Open-cell foam can soften echoes, reduce harsh high frequencies, and improve speech clarity. It will not stop a neighbor’s subwoofer from vibrating through a shared wall.

Placement changes the result. A foam panel near a first-reflection point can make vocals sound cleaner. Panels installed too high may leave nearby reflections untouched. Corners often need thicker treatment, because low-frequency energy gathers there. A small air gap behind each panel can also improve absorption at selected frequencies.

Small details matter.

This guide explores seven Soundproof Foam tips for better results, including panel thickness, spacing, corner placement, adhesive choices, and realistic expectations. It also considers room testing, because guessing often creates uneven coverage. A phone recording can reveal problems, though it is not a substitute for acoustic measurement. That is an important limitation.

The process is rarely perfect. You may add panels, listen again, and discover a new flutter echo. That is normal. Effective treatment comes from observing the room, adjusting carefully, and avoiding claims that foam alone can deliver complete soundproofing.
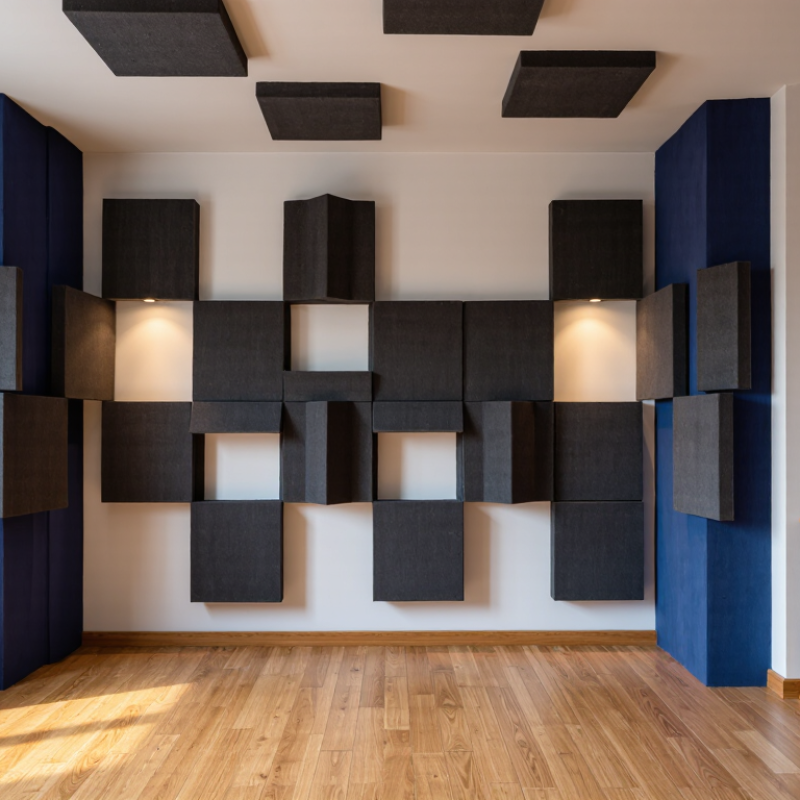
7 Soundproof Foam Tips for Better Soundproofing?

What Soundproof Foam Can and Cannot Do

7 Soundproof Foam Tips for Better Soundproofing?

Soundproof foam can reduce echoes, flutter, and harsh reflections inside a room. It cannot reliably stop traffic, footsteps, or loud neighbors. Foam mainly absorbs airborne energy after sound enters the room. It does not add meaningful mass to walls or create an airtight barrier. That distinction matters. A quiet recording corner may still leak sound through a thin door.

Check the test data before buying. ASTM C423 measures sound absorption, while ASTM E90 evaluates airborne sound transmission through building assemblies. They measure different problems. A panel showing an NRC of 0.80 may absorb much of the mid-frequency sound under laboratory conditions. Its performance can change with thickness, spacing, room size, and installation. The number is useful, but incomplete. The U.S. General Services Administration also identifies doors, glazing, gaps, and mechanical systems as common paths for sound transfer. Seal those weak points first. Use thick, porous panels for reflections, not thin decorative wedges alone.

Seven practical checks help: cover early reflection points; leave a small air gap; treat ceilings when footsteps remain; protect ventilation paths; test one wall before covering every surface; measure before and after; keep expectations modest. The World Health Organization’s Environmental Noise Guidelines link long-term exposure above recommended outdoor levels with sleep and health risks, but foam cannot guarantee protection. I have seen rooms become less tiring yet remain audible outside. That result is easy to misread. Better acoustics are not the same as true sound isolation.

What Soundproof Foam Can and Cannot Do

Typical random-incidence sound absorption coefficients for 50 mm open-cell acoustic foam. Absorption is strongest at mid and high frequencies, while low-frequency transmission requires mass, airtight construction, and structural isolation.

How to read this chart: A coefficient of 1.00 represents complete absorption in the test condition. These representative values vary with foam thickness, mounting, airflow resistance, room setup, and test method. Acoustic foam can reduce reflections and echo inside a room, but it does not provide major sound isolation or reliably block bass and noise passing through walls.

How to Choose the Right Soundproof Foam

7 Soundproof Foam Tips for Better Soundproofing?

How to Choose the Right Soundproof Foam

Choosing soundproof foam starts with identifying the real problem. Foam absorbs reflected sound inside a room, but it rarely blocks traffic, voices, or bass from passing through walls. For room echo, choose open-cell acoustic foam with a tested Noise Reduction Coefficient, or NRC. Higher ratings usually indicate stronger absorption, but test conditions can differ. Read the full report when available.

Thickness matters. Thin panels can reduce sharp reflections, while thicker foam usually handles a wider frequency range. For speech, podcasts, or online meetings, panels between 30 and 70 millimeters may work well. Bass needs more space, so corner traps or thicker absorbers are often more useful. Place panels at early reflection points, especially beside speakers and behind the listening position. Leave some wall area uncovered.

Safety should guide the final choice. Check documented fire-performance information and follow local building requirements. Avoid products with unclear material data or strong chemical odors. In my own room, I covered too much wall too quickly and made the sound unnaturally dull. That mistake taught me to test one panel at a time. A small hand clap, a voice recording, and careful listening can reveal more than appearance alone. Foam color is not performance. Expect some trial and error.

Where to Place Foam for Better Sound Control

Soundproof foam can improve clarity, but placement matters more than covering every visible surface. It absorbs reflected sound inside a room. It does not block traffic, voices, or bass from passing through walls. For better sound control, start by locating the room’s strongest reflection points.

Place foam on the side walls beside the listening position. Add panels where sound from the speakers first reaches each wall. Treat the ceiling above the desk or listening area, where reflections can blur speech.

Cover part of the rear wall, but leave some hard surface exposed for natural liveliness. Install thicker foam in corners when possible, although foam alone will not control deep bass effectively.

Place small panels behind microphones or instruments to reduce nearby reflections. Add limited coverage near a doorway to soften flutter echo, but do not expect foam to seal the door. It cannot.

Use a mirror to find side-wall reflection points. Sit where you normally listen, and ask someone to move a mirror along the wall. Mark each place where you can see a speaker. This method is simple and dependable. Avoid covering the entire room. Too much foam can make the space sound dull and strangely lifeless. Leave gaps between panels and test recordings after each change. The result may look uneven. That is often acceptable. Room shape, furniture, and low-frequency problems still require careful judgment.

How to Install Soundproof Foam Step by Step

Soundproof foam is often misunderstood. It reduces echo and harsh reflections, but it does not fully block outside noise. In my small recording room, I noticed the biggest improvement near the microphone and desk.

Start by clapping in the room and listening for sharp reflections. Use a mirror to locate wall areas visible from the listening position. Mark those points lightly. Measure each section before cutting the foam. Small errors become obvious later.

Clean the wall with a dry, lint-free cloth. The surface must be smooth and free from dust. Test your chosen removable adhesive on a hidden area first. Some paints may peel. Apply adhesive evenly to the foam’s back, then press it against the wall for several seconds. Do not cover vents, switches, or safety equipment.

Work in small sections. Keep the gaps consistent, even when the wall is imperfect. For corners, cut carefully with a sharp, stable blade. Leave some hard surfaces uncovered, because a room that absorbs every reflection can sound dull and unnatural. I once placed too much foam behind the speakers and lost vocal clarity. Removing two panels helped.

Play familiar speech and music after installation. Walk around the room and compare the sound from different positions. If the room still feels boomy, the problem may involve low frequencies, which thin foam cannot control well. Thicker treatment or bass-focused solutions may need professional advice.

Common Mistakes and Better Soundproofing Alternatives

Many people install acoustic foam expecting a quiet room. That expectation is the first mistake. Foam absorbs echoes inside a room, but it rarely blocks traffic, voices, or bass. I learned this after treating a small recording space. The room sounded less harsh, yet footsteps from the hallway remained obvious.

A common error is covering every wall with thin foam. This can make speech dull while leaving sound leakage unchanged. Another mistake is placing panels randomly, without checking reflection points. Use a mirror test to find spots where speakers appear from your seat. Add absorption there and near ceiling reflections. Leave some hard surfaces. Total coverage is not automatically better.

Real soundproofing needs mass, airtightness, and separation. Seal gaps around doors, frames, vents, and cable openings with suitable acoustic sealant. A solid-core door with perimeter seals often helps more than extra foam. For shared walls, consider a properly designed secondary wall with insulation and resilient connections. Rugs and heavy curtains can reduce high-frequency reflections, but they cannot stop low-frequency vibration. Measure before changing everything. Record the room at night, identify the loudest path, and fix one weakness at a time. My first attempt was over-damped and still noisy. Now, I test small sections before committing. Perfect results are uncommon.