
Please ensure Javascript is enabled for purposes of website accessibility

10 Tips for Choosing the Best Sound Deadening Panels

Choosing the right sound deadening panels is more complicated than picking the thickest product on a website. Room size, wall construction, noise type, and installation quality all influence the result. A panel that reduces echoes in a recording room may do little against traffic noise through a thin apartment wall. The details matter.

This guide draws on practical room-treatment experience and established acoustic principles. It will explain how to compare density, thickness, absorption ratings, surface design, and mounting methods. You will also see why fire safety, indoor-air quality, durability, and manufacturer testing deserve attention. Look for measurable data, such as Noise Reduction Coefficient ratings, rather than attractive promises alone. Still, ratings can mislead when testing conditions differ from your room. Read the fine print.

Start with the actual problem. Is speech bouncing across a hard office? Is bass traveling through a shared wall? Are footsteps entering from above? Each issue needs a different response. Sound deadening panels often improve reflection control, but they cannot replace structural isolation when vibrations pass through floors or framing. That distinction saves money and frustration.

I have seen beautifully arranged panels fail because gaps were ignored. Small gaps matter. A poorly mounted panel can also sag, stain, or leave exposed edges. The following ten tips will help you evaluate products carefully, balance performance with appearance, and avoid relying on vague marketing language. No single panel works everywhere. Your room decides.

10 Tips for Choosing the Best Sound Deadening Panels

Define Your Soundproofing Goals and Identify the Main Noise Sources

Before choosing sound deadening panels, define what you want to change.

Is the room echoing, or is traffic noise entering through a wall? These problems need different solutions. Panels can reduce reflections and make speech clearer, but they usually cannot stop sound passing through a poorly sealed door or thin partition. Be specific.

“A calmer office” is less useful than “less road noise near the desk.”

Identify the main noise sources at different times of day. Stand near windows, doors, shared walls, and HVAC vents; listen for steady hums, sharp impacts, or voices.

Notice where the sound seems strongest, though your ears can mislead you. A quick phone recording may help compare locations, but it is not a calibrated measurement. I still find this step easy to underestimate.

Tip:

Match the treatment to the problem. For echo, consider panel placement around reflective surfaces, such as a bare wall behind a speaker. For outside noise, inspect gaps and weak openings before buying panels.

Write down your goal, source, and room constraints. Then check panel coverage, thickness, and installation method against the manufacturer’s specifications.

A small test area can reveal whether the change helps. It may not fix everything, and that is worth knowing early.

Compare Panel Materials, Density, Thickness, and Sound Absorption Ratings

Tip 1: Identify the noise before choosing a panel. Porous fiberglass, mineral fiber, and acoustic foam absorb reflected speech and machine noise. They do not block heavy bass effectively. For traffic rumble, combine absorption with a dense barrier layer. Material choice matters more than appearance.

Tip 2: Compare density, but do not assume heavier always means better. Dense panels often control midrange reflections, while softer panels can absorb efficiently at higher frequencies. Check the manufacturer’s test data and installation method. Laboratory results may change in a real room. I have seen impressive ratings perform poorly after careless fitting.

Tip 3: Examine thickness and air gaps together. A 50-millimeter panel usually absorbs more low-frequency energy than a 25-millimeter panel. Leaving a small gap behind the panel can improve performance. It is easy to overlook. For absorption ratings, review the NRC value, but treat it as an average, not a complete promise. NRC mainly reflects common mid and high frequencies, not deep bass.

Tip 4: Match the rating to your actual space. A recording room may need balanced absorption, while an office may prioritize speech clarity. Install panels at reflection points first, then reassess with a short recording or sound-level test. Do not cover every surface blindly. I would also check edges, mounting stability, and fire-performance documentation before installation. Small gaps can weaken the result.

Choose the Right Panel Size, Shape, Coverage, and Installation Method

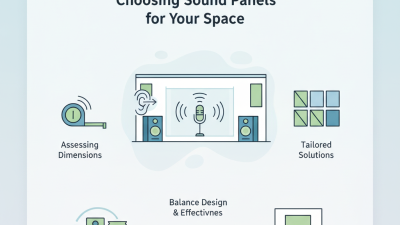
Choosing sound deadening panels starts with the room, not the product label. Measure wall height, desk position, and reflective surfaces. A 600-by-600-millimeter panel may suit a small wall, while larger panels can create uneven visual weight. Leave space around doors, windows, and lights. Sound needs somewhere to travel before treatment can help. Covering every surface is rarely necessary.

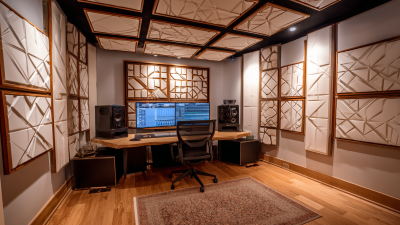
Panel shape affects both performance and appearance. Broad rectangles cover more reflection area with fewer seams. Narrow panels fit around shelves or corners, though gaps may reduce consistency. Place treatment at first-reflection points, often beside speakers and above a desk. A mirror test can identify these areas accurately. Measure coverage in square meters, not by guesswork. Starting near 20% wall coverage can work, but every room responds differently.

Installation should match the wall, panel weight, and required permanence. Removable clips suit rented spaces, while mechanical fixings provide stronger support. Adhesive can fail on dusty, painted, or uneven surfaces. Clean and test a small area first. Leave a small air gap behind absorptive panels when possible; it can improve low-frequency performance. I once mounted panels too high and noticed little change at the desk. The placement looked tidy, but the room still sounded harsh. Recheck the listening position before drilling. Safety ratings and manufacturer instructions also deserve attention, even when installation seems simple.

Evaluate Fire Safety, Moisture Resistance, Durability, and Environmental Impact

10 Tips for Choosing the Best Sound Deadening Panels

Fire safety should guide every panel decision, especially in bedrooms, studios, and shared buildings. Check independent fire-test reports, smoke ratings, and installation limits before buying. A panel can resist ignition yet produce dangerous smoke when improperly installed. Keep heat sources, wiring, and exposed edges away from the material. Tip 1: Ask for current test documentation, not just a safety claim.

Moisture resistance matters in basements, workshops, and rooms with changing humidity. Look for closed-cell structures, sealed surfaces, or documented mold resistance. Inspect the backing too; weak adhesives can loosen after condensation forms. Durability includes surface wear, compression recovery, and resistance to cleaning. I once trusted a thick panel that softened near a window. Thickness alone was a poor indicator. Tip 2: Test a small sample for one week in the actual room.

Environmental impact requires more than recycled content. Review volatile organic compound data, recycled percentage, manufacturing disclosures, and disposal options. Lower emissions are especially important in small rooms with limited ventilation. Materials with long service lives can reduce replacement waste, even when their recycled content is modest. This trade-off deserves honest consideration. Tip 3: Request lifecycle information and compare the complete product, including adhesives and packaging. Experienced installers also check panel weight, cutting waste, and attachment methods before ordering. Reliable choices come from documented performance, practical testing, and realistic maintenance expectations.

10 Tips for Choosing the Best Sound Deadening Panels - Evaluate Fire Safety, Moisture Resistance, Durability, and Environmental Impact

No. What to Evaluate What to Check Practical Selection Tip
1 Sound absorption or sound blocking Absorptive panels reduce reflections and reverberation inside a room. Blocking sound between rooms generally requires a heavier, airtight wall or floor assembly. Identify whether the goal is a quieter room, less echo, or less sound passing through a partition; a panel alone may not achieve all three.
2 Acoustic test data Look for a Noise Reduction Coefficient (NRC) or sound absorption test report. NRC is a rounded rating of sound absorption across selected frequencies, not a measure of sound transmission loss. Compare panels only when thickness, mounting method, air gap, and test method are comparable; ask for the full test details.
3 Fire safety Check applicable local building-code requirements and product test reports. ASTM E84 or UL 723 reports address surface flame spread and smoke developed under specified test conditions. Verify the rating applies to the exact panel and installation configuration. A test result is not a guarantee of performance in every fire scenario.
4 Moisture resistance Review water-absorption or humidity-related test information, cleaning guidance, and any limits for damp or exterior locations. Some porous absorbers can hold moisture if exposed to leaks or condensation. For humid areas, choose a product documented for the intended conditions and address the source of moisture before installation.
5 Durability and impact resistance Consider facing strength, edge protection, resistance to sagging or compression, and whether the panel can withstand routine contact in its location. Use a protective facing or a more robust construction in corridors, workshops, and other areas where panels may be bumped or touched.
6 Indoor air quality Request information about VOC emissions, binders, adhesives, and any relevant third-party emissions certification or test results. Assess the complete installed system, including adhesive and coatings, rather than relying only on claims about the panel core.
7 Environmental impact Review recycled or renewable content, manufacturing disclosures, environmental product declarations (EPDs), and end-of-life options where available. Prefer specific, verifiable documentation over broad terms such as “green” or “eco-friendly.” Consider product life span as well as recycled content.
8 Thickness, size, and coverage Panel thickness and installation details affect absorption performance; the amount and placement of coverage also influence room acoustics. Check test data for the thickness and mounting arrangement you plan to use, then plan coverage around the room’s reflective surfaces.
9 Installation and maintenance Review mounting requirements, substrate compatibility, cleaning instructions, repair options, and whether installation affects the fire or acoustic test conditions. Include compatible fixings or adhesives in the project plan and follow the manufacturer’s installation and care instructions.
10 Cost over the product life Compare purchase price, installation labor, expected maintenance, replacement needs, and disposal or reuse options. Evaluate total installed cost and documented service-life information, not just the price per panel.

Note: Acoustic, fire, moisture, and emissions performance depends on the specific product and installation. Confirm current test documentation and local code requirements before purchase.

Set a Realistic Budget and Check Product Quality Before Buying

A realistic budget is the first filter when choosing sound deadening panels. In my room treatment projects, I have seen buyers compare price per panel and miss total coverage. A low-cost pack may cover only two square meters, while a slightly higher-priced option may cover twice that area. Measure each wall, ceiling, and problem zone before buying. Keep 10 to 15 percent of your budget for adhesive, edge trimming, and replacement pieces. Small extras add up.

Quality deserves equal attention. Check each panel’s thickness, density, fire-safety documentation, and installation instructions. Ask whether its acoustic rating comes from an independent laboratory or promotional wording. A product can feel heavy yet absorb little mid-frequency noise. Sound absorption also differs from true sound blocking. Tap tests help, but they are not enough. Place a sample near a speaker and listen for reduced echo at normal conversation volume. The result cannot replace laboratory data, but it can expose obvious weaknesses. Look closely at the backing. Peeling corners, uneven cuts, or a sharp chemical smell may indicate poor manufacturing control.

Do not buy the maximum package immediately. Start with a small area and record the room before and after treatment. I once overestimated panel performance because furniture changed the sound at the same time. That mistake taught me to test one variable at a time. Compare return policies, warranty terms, and measured specifications. Cheap panels can become expensive when they need replacement or extra layers. A practical choice balances coverage, verified quality, and the limits of your room.