

Please ensure Javascript is enabled for purposes of website accessibility

10 Tips for Buying a Wall Mounted Toilet Bowl

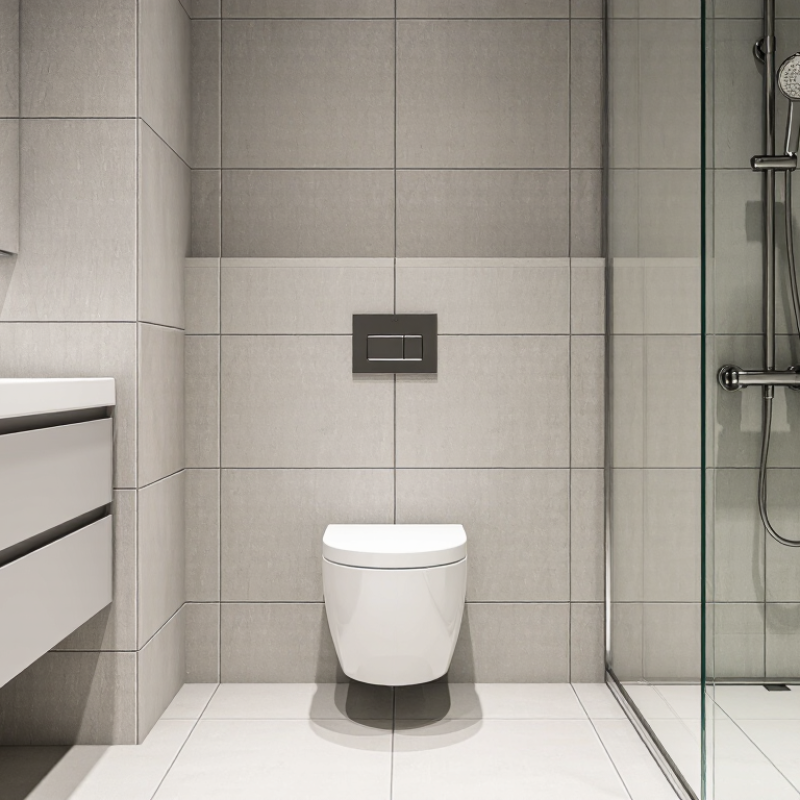
A wall-mounted toilet can make a small bathroom feel wider, cleaner, and easier to mop. Yet appearance is only one part of the decision. The phrase “Toilet Bowl Wall Mounted” describes the visible fixture, not the complete installation system. Behind the wall, a steel carrier, concealed cistern, flush plate, and waste connection must work together. That hidden structure deserves careful attention.

The U.S. Environmental Protection Agency’s WaterSense specifications identify efficient toilets that use no more than 1.28 gallons per flush while maintaining verified performance. This matters because a weak flush can create frustration, even when the bathroom looks modern. The Houzz 2024 U.S. Bathroom Trends Study also reflects continuing homeowner interest in updated bathrooms, improved functionality, and easier maintenance. These reports support a practical approach, but they do not replace product testing or professional inspection. Check the manufacturer’s technical drawings.

A reliable purchase begins with the wall structure, rough-in dimensions, seat height, flush performance, access panel, and spare-part availability. Measure twice. A few centimeters can decide whether the carrier fits correctly. The finished floor height also affects comfort for children, older adults, and taller users. I have seen attractive bathroom plans become expensive after the concealed tank was overlooked. That mistake is avoidable, but not always obvious in showroom photographs. This guide presents ten focused tips for comparing models, installation systems, water use, cleaning needs, warranty terms, and long-term repair access. The best choice is not necessarily the most expensive one. It is the system that remains dependable after the tiles are sealed and the renovation team has left.
10 Tips for Buying a Wall Mounted Toilet Bowl

Assess Your Bathroom Space and Wall-Mounted Toilet Needs

Assess Your Bathroom Space and Wall-Mounted Toilet Needs

Before choosing a wall-mounted toilet bowl, measure the bathroom carefully. Record wall depth, finished floor height, drain location, and door clearance. The carrier frame needs a suitable cavity and strong structural support. A shallow wall may require extra framing, reducing usable floor area. That detail is easy to miss.

Check the user’s daily needs, too. A raised bowl can improve cleaning access and may help some users transfer more easily. However, seat height should match the household, not only current preferences. Children, older adults, and wheelchair users may need different dimensions. The 2024 NKBA Bathroom Design Trends Report continues to identify accessibility and easier maintenance as important bathroom planning priorities.

Water performance deserves equal attention. The U.S. Environmental Protection Agency’s WaterSense program reports that replacing an older toilet with a certified high-efficiency model can save a household nearly 13,000 gallons of water annually. Look for a model rated at 1.28 gallons per flush or less, then verify its flush-performance test results. Water savings alone do not guarantee comfort. I would also check access to the concealed cistern and flush mechanism. Repairs become frustrating when every service point is treated as invisible. Measure twice. Plan service access before the wall closes.

Verify Wall Strength, Carrier Frame, and Plumbing Compatibility

10 Tips for Buying a Wall Mounted Toilet Bowl

Tip 1: Verify the wall’s strength before choosing a wall mounted toilet bowl. A tiled wall may look solid but hide weak framing. Tap the surface, inspect accessible studs, and ask a qualified contractor to assess the structure. Tip 2: Check whether the wall can support a concealed carrier frame. The frame transfers the toilet’s weight into the floor and wall. Tip 3: Confirm the finished wall depth. A shallow wall may not accommodate the tank, frame, and service opening.

Tip 4: Match the carrier frame with the bowl’s mounting points. Small measurement errors can cause movement or uneven pressure. Tip 5: Inspect the floor beneath the wall. Even a strong frame needs stable support. Tip 6: Compare the existing waste pipe location with the carrier outlet. Pipe offsets may require professional adjustments. Tip 7: Check water supply height and inlet position before installation. I once assumed the old connection would fit. That assumption was wrong.

Tip 8: Ask a licensed plumber to verify drainage slope and venting requirements. Poor compatibility can create slow flushing, odors, or leaks inside the wall. Tip 9: Keep access to the concealed cistern practical. A hidden system still needs maintenance. Tip 10: Request written installation details and confirm local plumbing requirements. Do not rely only on showroom measurements. Take photographs before closing the wall, especially around joints and supports. Recheck everything.

10 Tips for Buying a Wall Mounted Toilet Bowl - Verify Wall Strength, Carrier Frame, and Plumbing Compatibility

No. Buying Dimension What to Verify Practical Guidance Suggested Check
1 Wall Strength Confirm that the wall or supporting structure can carry the carrier frame, toilet, user load, and dynamic loads. Do not rely on wallboard alone. A load-bearing frame should transfer force to structural studs, masonry, or the floor. Have a qualified installer inspect framing and follow local building requirements before closing the wall.
2 Carrier Frame Quality Check the frame material, welded joints, mounting points, adjustable supports, and corrosion protection. A rigid steel frame with secure floor and wall anchoring helps prevent movement, cracking, and noise. Review the installation manual and confirm that all required anchors and brackets are included.
3 Plumbing Compatibility Verify the waste outlet direction, drain diameter, water inlet position, and connection types. Wall-hung toilets commonly use a concealed horizontal or rear waste connection, but exact dimensions vary by system. Measure existing supply and drain locations and compare them with the technical drawing before purchase.
4 Rough-In Measurement Measure the distance from the finished wall to the waste outlet and the position of the mounting bolts. The rough-in must match the carrier frame and bowl; even small discrepancies can cause installation problems. Use the final finished-wall surface as the reference point, not the unfinished studs.
5 Bowl Size and Projection Compare the bowl width, height, depth, and projection from the finished wall with the available bathroom space. A compact bowl can improve circulation, while a deeper bowl may provide more seating comfort. Leave adequate clearance in front of the toilet and beside it according to applicable accessibility or building codes.
6 Seat Height Check the finished seat height, including the toilet seat, after the frame and floor are completed. Many installations use an adjustable frame so the height can be adapted to household needs and code requirements. Confirm the adjustment range before the wall is closed, especially for children, older adults, or accessible bathrooms.
7 Flush System and Water Use Review the flush volume, operating pressure, flush plate compatibility, and local water-efficiency requirements. Dual-flush systems often offer separate reduced and full flush volumes; actual performance depends on plumbing and installation. Choose a flush system rated for the available household water pressure and permitted by local regulations.
8 Leak Access and Maintenance Ensure the concealed cistern has service access through the flush-plate opening. Internal valves and seals should be replaceable without removing tile, drywall, or the toilet bowl. Ask for replacement-part availability and confirm that shut-off access is provided inside the service opening.
9 Noise and Condensation Control Check for insulated cisterns, vibration-reducing pads, quiet-fill components, and properly supported pipework. Insulation can reduce condensation on the tank and help limit sound transfer through the wall cavity. Verify that all pipe connections are secure and that the carrier frame is isolated from finished surfaces where specified.
10 Installation Documentation Confirm that the package includes clear dimensions, installation steps, adjustment instructions, and technical specifications. Accurate documentation helps coordinate framing, plumbing, waterproofing, tiling, and final fixture installation. Keep the technical drawings and service information after installation for future repairs or bathroom remodeling.

Note: Dimensions, connection sizes, load ratings, flush volumes, and code requirements vary by installation system and location. Always confirm the manufacturer’s technical drawing and applicable local plumbing and building regulations before purchase.

Compare Bowl Size, Shape, Materials, Comfort, and Flush Performance

Buying a wall-mounted toilet bowl requires more than admiring its clean, floating appearance. Measure wall space, bowl projection, and leg clearance before choosing a model. A compact bowl saves room, but it may feel restrictive during daily use. A deeper, elongated shape often supports adults better, although it needs more projection. I once underestimated knee clearance; the installation looked neat but felt awkward. Comfort deserves practical testing.

Tip 1: Compare materials carefully. Vitreous china usually offers a smooth, durable surface that resists staining. Inspect the glaze under bright light. Small rough patches may collect residue over time. Check the seat height, bowl width, and seat shape, too. Sit on a display model if possible. Five minutes of testing can reveal pressure points that measurements miss.

Tip 2: Study flush performance, not just appearance. Ask about water consumption, flushing strength, bowl rinsing, and noise. A powerful flush should clear waste without repeated operation. The hidden carrier frame also matters. Confirm its load rating and adjustment range with a qualified installer. Tip 3: Read the maintenance requirements. Access panels should allow servicing without removing the bowl. Some sleek designs hide hardware extremely well, but repairs may become inconvenient. I would prioritize reliable access over a perfectly seamless look.

Review Installation Access, Cleaning Requirements, and Water Efficiency

A wall-mounted toilet can free floor space, but the installation wall needs careful planning. Check whether it can support a concealed carrier and water tank. Confirm the wall depth before buying. A narrow cavity may require structural changes. Leave access through a service panel. Without it, a small valve problem can become a major repair. Keep the shutoff valve reachable by hand. Ask a qualified plumber to verify pipe positions and local requirements.

Cleaning is easier when the bowl floats above the floor. Dust cannot collect around a pedestal. Still, inspect the underside and wall joints regularly. Use a soft brush and a mild, non-abrasive cleaner. Harsh chemicals may damage seals or finishes. Look for moisture after each flush during the first week. I once ignored a faint dripping sound. It later revealed a loose connection. That mistake changed how I check new installations.

Water efficiency depends on more than the advertised flush volume. Compare the full-flush and reduced-flush settings. A strong rinse can prevent repeat flushing, which wastes more water overall. Test several paper loads before final acceptance. Some bowls perform well with light use but struggle during busy mornings. Check the refill speed and listen for running water. A quiet, stable valve is a useful sign. However, efficiency claims need practical testing at home. Don’t assume the lowest number is always the best choice.

Check Standards, Total Cost, Warranty, and Seller Support

10 Tips for Buying a Wall Mounted Toilet Bowl

Check Standards, Total Cost, Warranty, and Seller Support

Before choosing a wall mounted toilet bowl, check the standards used in your area. Confirm water efficiency, flushing performance, ceramic quality, and load requirements. The concealed carrier must match the wall structure and installation method. Ask for certification documents, not only attractive product photos. Measure the rough-in distance carefully. A small mistake can create expensive plumbing changes.

The purchase price is only one part of the budget. Include the carrier frame, flush plate, inlet valve, waste connection, wall reinforcement, labor, and future access panels. Some bathrooms need extra tile cutting or waterproofing. I once underestimated the cost of moving a supply pipe. That mistake still bothers me. Use a written quotation with every component listed. Keep a small repair allowance.

Read the warranty before paying. Check which parts are covered, for how long, and whether labor is excluded. Clarify who handles cracked ceramic, leaking valves, or missing hardware. Reliable sellers provide installation drawings, replacement-part information, and responsive technical support. Test their support before ordering. Send a practical question and judge the reply. Vague answers are a warning. Also confirm return conditions, delivery inspection rules, and spare-part availability. A polished listing can still hide weak after-sales service.